Using AutoCode Solution Generator
Purpose
This document aims to help you step by step, to create your solution/project and generate backend web services & UI pages from end to end by using Net Core Genesis’ CLI-Command Line Interface AutoCode Solution Generator just in 3-5 minutes.
It's assumed that you already purchased and created your Net Core Genesis account.
Prerequisites
- Please check [Prerequisites] section and complete them before continuing.
- Also remember that AutoCode Solution Generator uses Database-First approach to create your solution/project.
Download AutoCode Solution Generator file using one of the links below according to your operating system
Windows
https://api.netcoregenesis.com/Genesis/download/cli?operatingsystem=win-x64
MAC OS
https://api.netcoregenesis.com/Genesis/download/cli?operatingsystem=osx-x64
Linux
https://api.netcoregenesis.com/Genesis/download/cli?operatingsystem=linux-x64
Note: You may have a security warning in your browser since the file contains exe file. Don’t worry and continue to download (or check it first by Kaspersky VirusDesk)
You’ll get a file named "genesis-yourOSname-x64.tar.gz"
- Unzip the file
- Open a Terminal
- Change directory to the unzipped folder
cd genesis-yourOSname-x64
Note : If you get any error through the installation which blocks you, check the log files in genesis-yourOSname-x64/Logs
Start creating a project
Run the create command: For Windows
genesis create --path {full_or_relative_path_to_new_project}
For Mac
./genesis create --path {full_or_relative_path_to_new_project}
If you've already ran create command before, you have a config file in Configs folder
./genesis create --from-config {your_config_file_in_Configs_folder.json}
If the specified path does not exist, it will be created. If you don’t specify a path, it will be created on your Desktop with the name of {YourSolutionName}
Some examples:
For Windows
genesis create ./
genesis create --path ./MyUnicornProject
For Mac
./genesis create ./
./genesis create --path ./MyUnicornProject
From Config file
./genesis create --from-config config_create_2019-07-01-14-53.json
Note: To see available functions, run ./genesis create --help
Please enter your Genesis subscription credentials to authenticate;
E-mail address :
Password:
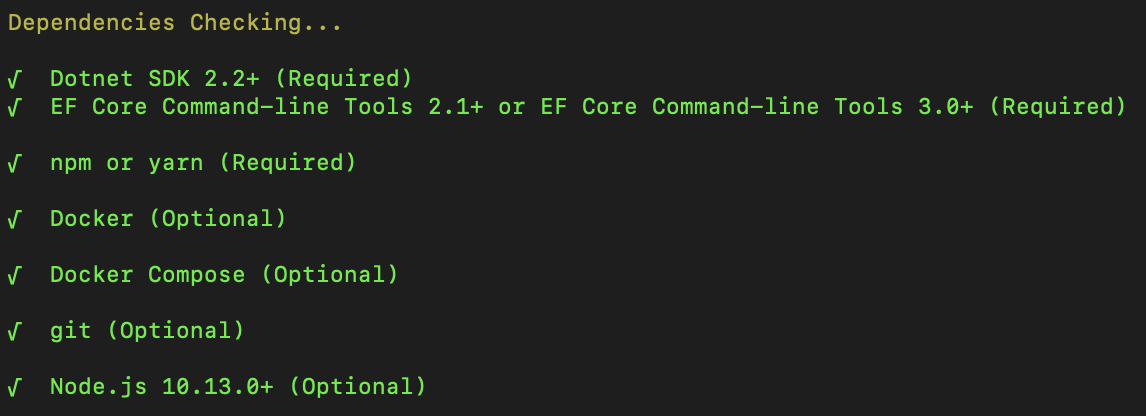
After authentication, dependencies will be checked
If you see each one is checked, you’re ready to go.
Please choose template type
There are 2 architecture types. If you are unsure about it, generally option “(1) - Single Microservice (Monolithic)” will be suitable for you.
Type the number and press enter.
(1) - Single Microservice (Monolithic):  _This is the standard MVC project._
(2) - Multiple Microservices and a Gateway:  _If you follow a Microservices architecture, choose this one._
Application/Solution Name : Default=(My_Application)
Specify any name of your choice for your solution and press enter.
Use only alphanumeric, . (dot) and _ (underscore) characters.
You can skip simply by pressing enter, the default name will be My_Application.
Microservice Name : Default=(Microservice)
Specify any name of your choice for your services and press enter.
Use only alphanumeric and _ (underscore) characters.
You can skip simply by pressing enter, the default name will be Microservice.
If you’ve chosen “(2) - Multiple Microservices and a Gateway” in previous steps, You will be asked for BFF and Microservice names separately.
i) Backend For Frontend Name : Default=(BFF)
ii) Microservice 1 Name : Default=(Microservice_1)
iii) Microservice 2 Name : Default=(Microservice_2)
iv) Microservice 3 Name : Default=(Microservice_3)
Database Type
*Warning: Be sure your database is up and running properly with the given connection data from now on.*
Type the number and press enter.
(1) - MSSQL
(2) - PostgreSQL
(3) - MySQL
(4) - Oracle
How do you want to create your connection string?
This connection string will be used to scaffold your web services and UI pages from your existing database. So be sure it is correct.
Type the number and press enter.
(1) - Provide full connection string. (If you are not sure, use option #2)
(2) - Use connection string builder to create it.
(3) - Leave it blank. (Scaffold step cannot be used)
Some connection string examples:
Warning: ignore { and } characters when you replace with your real data. Also change user name/id if necessary.
1) MSSQL
Server=127.0.0.1;Database={Your_DB_Name};User Id=sa;Password={Your_User_Password};
2) PostgreSQL
User ID=postgres;Password={Your_User_Password};Host=127.0.0.1;Port=5432;Database={Your_DB_Name};Pooling=true;
3) MySQL
Server=localhost;Database={Your_DB_Name};Uid=root;Pwd={Your_User_Password};
An example of MySQL DB for option "(2) - Use connection string builder to create it":
Database Name : MyDB_Name
Host : 127.0.0.1
Port: 3306
User: root
Please select 'schemas' to use at scaffold step.
If there is only 1 schema, this step will be skipped.
If there are more than one, choose Schemas in order to fetch their 'tables'.
(Press <space> to select/deselect, <a> to toggle all, <enter> to continue)

◉ Schema1
❯◯ Schema2  #  excluded by pressing <space>
◉ Schema3
Please select 'tables' to use at scaffold step.
Choose tables in order them to be used for generating web services and UI pages.
(Press <space> to select/deselect, <a> to toggle all, <enter> to continue)
◉ Table1
❯◯ Table2  #  excluded by pressing <space>
◉ Table3
◉ Table4
◉ Table5
Please enter valid information to create Genesis database.
Genesis database is the core database required for framework to run.
You can either specify the same database as above or use/create a separate one. If there is not an existing database with the name specified, migration step will create it.
Database Type
Type the number and press enter.
(1) - MSSQL
(2) - PostgreSQL
(3) - MySQL
(4) - Oracle
How do you want to create your connection string?
Type the number and press enter.
(1) - Provide full connection string.  _(If you are not sure, use option #2)_
(2) - Use connection string builder to create it.
Do you want to create UI project?
An administration panel including all of your pages with labels, components, rules, validations and so on from your database will be created from scratch. It is developed in React JS.
Type the number and press enter.
(1) - Create empty UI project.
(2) - Create UI project and generate pages/models from database.  _(Recommended)_
(3) - Skip.
UI Project Name : Default=(UI)
Specify any name of your choice for your UI project and press enter.
You can skip simply by pressing enter, the default name will be UI.
You’ll see a summary of your choices
=========================================================================

-Summary-
Template Type : Single Microservice (Monolithic)
ApplicationName : Your_Application_Name
Database Type(Genesis): MySQL
Connection string(Genesis) : Server=localhost;Database=Your_GenesisDB_Name;Uid=Your_User_Name;Pwd= Your_User_Password;
UI Choice : Create empty UI project.
Path : /Users/Downloads/genesis-osx-x64/My_Application
Microservice(s)
MicroserviceName : Your_Microservice_Name
Database Type: MySQL
Connection string : Server=localhost;Database=Your_DB_Name;Uid=Your_User_Name;Pwd=Your_User_Password;
-Summary end-
Saved current configuration.(Pass --from-config {configName} argument to restore config)

=========================================================================
Do you want to proceed ?
(y/yes) - Yes
(n/no) - No
If you are satisfied with the summary, type yes and press enter
Building projects can take several minutes to complete, have a coffee and lean back.
Do you want to run the projects with Docker ?
If you are a professional, use Docker. Otherwise <no> will be more suitable for you.
* If you choose <yes>, please keep in mind that all projects (Backend, UI, Redis, Kafka etc.) will be copied to, built and ran on Docker, so it takes about 20-25 mins extra
(y/yes) - Yes
(n/no) - No
Process completed successfully.
Congratulations body. You have an almost well structured professional project. ✌️
You can run the UI project with following codes.
---> cd /projectPathSpecified/My_Application/UI
---> yarn start
or
---> npm start
You can run the API projects from following solution file.
Solution file path :  projectPathSpecified/My_Application/My_Application.sln_
Now jump to "How To Run Your Web Application" and see what's happening
Note : If you get any error through the installation which blocks you, check the log files in genesis-yourOSname-x64/Logs folder.